


 Français
 Español
 中文简体
中文简体 русский
Gongzheng
Gongzheng
Gongzheng
Gongzheng
Gongzheng
Gongzheng
Gongzheng
Gongzheng
Gongzheng
Gongzheng
Gongzheng
Gongzheng
Gongzheng
Gongzheng
Gongzheng
Gongzheng

Content
- 0.1 Saturated Desiccant Cartridge
- 0.2 Oil Carryover
- 0.3 Purge Valve Leaking
- 0.4 Purge Valve Not Opening
- 0.5 Blocked Drain Path
- 0.6 Freezing
- 0.7 Wrong Sizing or Specification
- 0.8 Installation, Wiring and Governor Faults
- 1 The Eight Failure Modes That Cover Most Air Dryer Complaints
- 2 Problem 1: The Desiccant Cartridge Is Saturated, Contaminated or Simply Wrong
- 3 Problem 2: Purge and Drain Valves Stop Working
- 4 Problem 3: Oil Carryover From the Compressor
- 5 Problem 4: Freezing and Winter Blockage
- 6 Problem 5: Wrong Sizing, Wrong Rating, Wrong Cartridge
- 7 Problem 6: Installation and Mounting Mistakes
- 8 Problem 7: Electrical and Sensor Faults on Integrated Units
- 9 Problem 8: Pressure Drop, Governor Interaction and Short Cycling
- 10 Symptom-to-Cause Reference for the Workshop
- 11 Which Failure Mode Dominates in Real Service Data
- 12 Specification and Tolerance Checklist
- 13 Repair or Replace: Practical Decision Rules
- 14 Realistic Service Intervals by Duty Cycle
- 15 Frequently Asked Questions
- 15.1 Why is my air dryer purging water instead of just air?
- 15.2 How often should an air dryer cartridge be replaced?
- 15.3 Can a truck be driven with a failed air dryer?
- 15.4 Why does my air dryer freeze in winter?
- 15.5 Why does the compressor keep running?
- 15.6 What causes oil to appear in the air dryer?
- 15.7 How do I know whether the problem is the cartridge or the purge valve?
- 15.8 Do I need a coalescing cartridge?
- 15.9 What pressure drop across an air dryer is acceptable?
- 15.10 Why did my new cartridge fail within three months?
- 16 What to Have Ready When You Order a Replacement
A commercial vehicle air dryer has a short list of ways to go wrong, and most roadside or workshop diagnoses land on one of them: the desiccant cartridge is saturated or oil-fouled, the purge valve stops sealing or stops opening, the drain path blocks with sludge, the exhaust port freezes in winter, the replacement cartridge is the wrong size or the wrong type, the installation puts road spray and vibration into the housing, the heater or sensor circuit fails, or a leaking air system keeps the compressor loaded so the dryer never gets a chance to regenerate. Every other complaint is usually a variation on one of these themes.
Saturated Desiccant Cartridge
The cartridge holds a fixed amount of water. Once it is full, moisture travels straight into the wet tank and then into every valve downstream.
Oil Carryover
Oil from a worn compressor coats the desiccant beads, blocks their pores, and cuts drying capacity long before the service interval is reached.
Purge Valve Leaking
A seat that will not seal bleeds pressure continuously. The compressor runs loaded almost all the time and the system never reaches cut-out.
Purge Valve Not Opening
When the valve cannot dump, condensate stays inside the housing and is pushed downstream on the next charge cycle.
Blocked Drain Path
Automatic drain valves and condenser drains clog with carbon, oil emulsion and rust. Water then has nowhere to go except into the circuit.
Freezing
Ice forms at the exhaust port, in the purge valve bore and in drain lines. A failed heater element or thermostat turns a cold night into a no-build fault.
Wrong Sizing or Specification
A cartridge rated below the compressor output, or an assembly rated at the wrong flow, produces pressure drop and a wet system even when new.
Installation, Wiring and Governor Faults
Wrong mounting angle, cracked brackets, chafed harnesses and poor governor settings all imitate an internal dryer failure.
The short answer first: air dryers rarely fail because the desiccant simply "wears out". They fail because something contaminates it, because a valve stops sealing, because water cannot leave the housing, or because the system around the dryer never lets it regenerate. That distinction matters commercially. If you replace a cartridge without correcting oil carryover, a leaking purge valve or a blocked drain, the new cartridge will show the same symptoms within a few months, and the warranty conversation becomes difficult for everyone.
Work through the failure mode, not just the part. The sections below explain what each problem looks like, what it does to the air system, and what actually fixes it.
The Eight Failure Modes That Cover Most Air Dryer Complaints
The table below is the working list we use when a fleet or a workshop describes a dryer problem without a fault code. Read down the second column to match the symptom, then across to the cause. It is deliberately ordered by how often each mode appears in returned cores and service reports.
| Failure mode | First symptom noticed | Underlying cause | Immediate effect |
|---|---|---|---|
| Saturated or contaminated desiccant cartridge | Water at the wet tank drain, white powder in the tank | Exceeded service interval, oil fouling, wrong cartridge capacity | Moisture reaches brake valves, ABS modulators and reservoirs |
| Purge valve leaking | Continuous hiss at the dryer, compressor never unloads | Damaged seat, debris, hardened seal, weak spring | Constant air loss, long build-up time, high compressor duty |
| Purge valve not opening | No purge blast heard at cut-out | Frozen bore, stuck piston, blocked exhaust, failed control line | Condensate stays in the housing and is carried downstream |
| Drain and condenser blockage | Water in lines despite a dry-looking cartridge | Sludge, carbon, rust particles in the drain orifice | Water accumulates and is re-entrained into the air stream |
| Freezing and heater failure | No pressure build-up on cold mornings, then normal operation later | Open heater element, failed thermostat, water in the wrong place | Temporary total loss of charge, or an over-pressured wet section |
| Wrong sizing or specification | System works but builds slowly and stays wet | Cartridge or assembly rated below compressor output | Permanent pressure drop and poor dew point at rated flow |
| Installation damage | Cracked bracket, chafed hose, oil mist around the housing | Wrong mounting angle, vibration, road spray, over-torqued fittings | Leaks, seal distortion and premature internal wear |
| Electrical and sensor faults | Dashboard warning, stored fault code, heater not cycling | Harness corrosion, failed sensor, wrong supply voltage | Diagnosis points at the dryer when the fault is in the wiring |
Notice how few of these are genuinely internal, mechanical breakdowns of the housing itself. The housing, base and ports are usually the most durable part of the assembly. What fails is the consumable inside it and the small valves that manage air and water movement. That is why diagnosis should always start with the interface between the dryer and the rest of the air system.
Problem 1: The Desiccant Cartridge Is Saturated, Contaminated or Simply Wrong
The cartridge is the only part of a truck air dryer that is designed to be consumed. It contains a bed of desiccant that adsorbs water vapour from the compressed air charge, and it relies on a reverse flow of dry air during the purge cycle to release that water and expel it through the purge valve. Capacity is finite and is expressed in grams of water the bed can hold before breakthrough.
How Saturation Actually Happens
Saturation is not a gradual failure that announces itself. In normal duty, a cartridge holds moisture in the upper part of the bed for months and then passes water within a short window, often a single long downhill run or a humid week. Three conditions accelerate it:
- Exceeded interval. Most European and North American platforms specify a cartridge change at around 12 months or 100,000 km, whichever comes first. Severe duty fleets often halve that.
- Too few purge cycles. Purge only happens when the compressor unloads. A system with significant leakage may keep the compressor loaded for most of the shift, so the number of purge events per hour drops from something like 25-30 to fewer than 10. The bed never fully regenerates.
- Oil and carbon contamination. Compressor oil and carbon particles coat the desiccant surface. The bed still looks intact when removed, which is why oil-fouled cartridges are frequently misdiagnosed as "not worn out".
What a Saturated Cartridge Does Downstream
Moisture that leaves the dryer does not stay in the wet tank. It travels with the air charge into the four-circuit protection valve, the foot brake valve, the relay valves, the ABS or EBS modulators and the brake chambers. In cold conditions it freezes in the smallest orifices first, which are usually inside the control valves rather than the dryer. The result is a vehicle that builds pressure normally in the workshop and then loses a circuit on the road at -5 °C.
What to Check Before Fitting a New Cartridge
- Drain the wet tank and look at what comes out. Clear water is condensation. Black or grey emulsion indicates oil carryover. White grit indicates desiccant fines escaping past a damaged or missing filter element.
- Confirm the cartridge part number against the platform. A cartridge with the same thread and the same external dimensions can still have a different desiccant volume and a different flow rating.
- Inspect the cartridge seal and the housing seat. A pinched or missing seal lets unfiltered air bypass the bed entirely, which produces "new cartridge, still wet" complaints.
- Record the installation date and mileage on the housing. Interval discipline solves more moisture complaints than any component change.
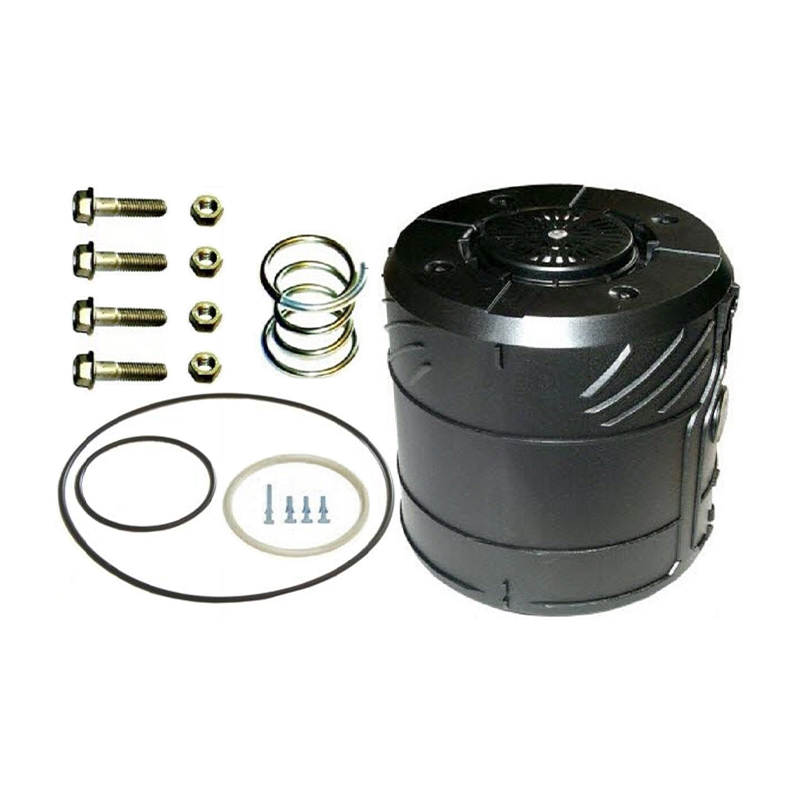 Integrated Air Dryer Cartridge for Commercial Vehicle Pneumatic SystemsA replacement for OEM 77430 with high-efficiency desiccant and oil-mist filtration, helping shield braking valves and air bellows from moisture, particles and icing.View Product →
For fleets running mixed European platforms, cartridges with a defined desiccant mass and a proper filter element on the outlet side are the practical baseline. A cartridge that saves a few percent on price but carries 15-20% less desiccant simply shifts the failure one season later.
Problem 2: Purge and Drain Valves Stop Working
The purge valve is the part of the dryer that actually removes the water. It opens for a fraction of a second each time the governor unloads the compressor, dumping the moisture-laden air, and it must seal perfectly the rest of the time. Two opposite failures occur, and they have opposite symptoms.
Purge Valve Stuck Open
This is the most expensive failure mode in fuel terms. A purge valve that will not seal creates a permanent leak at the dryer exhaust. The system pressure falls below cut-in, the compressor reloads, and the cycle repeats continuously. Practical consequences:
- Build-up time from empty becomes noticeably longer, and the low-pressure warning stays on longer than usual.
- Compressor duty cycle can go from roughly 25% to nearly continuous, with a measurable fuel penalty and much higher compressor discharge temperatures.
- Because the compressor never properly unloads, purge events almost stop. Moisture accumulates even though the valve is technically "working".
- Hot discharge air entering a dryer with a saturated bed pushes moisture through into the reservoirs.
Root causes are usually simple: a damaged valve seat, a piece of carbon or desiccant fines trapped under the seat, a hardened or swollen seal, or a fatigued return spring. On units with a heated purge valve, a failed heater can also hold the valve partially open through ice formation in the bore.
Purge Valve Stuck Closed
Here the symptom is silence. The operator hears no purge blast at cut-out. Condensate that should have been expelled remains inside the housing and is picked up on the next charge. In winter, the water freezes in the exhaust port and the valve can be physically locked shut, which then produces a pressure build-up fault the following morning.
Drain Valve and Condenser Blockage
On vehicles with a separate condenser or an automatic drain valve upstream of the dryer, the drain orifice is a narrow passage that sees the dirtiest air in the system. Carbon, oil emulsion and rust particles form a paste that closes it completely. Automatic drain valves that operate on a pressure trigger fail in two ways: they stop opening, or they stay open and bleed the circuit. Both produce water complaints that look like a dryer fault. Automatic condenser drain valve units with a defined trigger pressure and a replaceable seal are far easier to service than units that must be removed and cleaned as a whole.
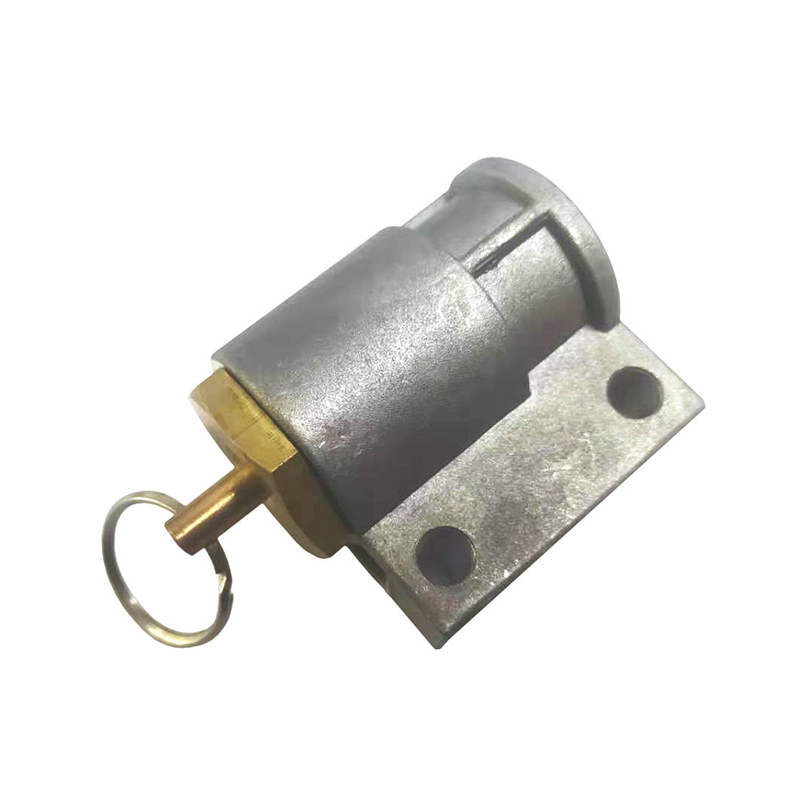 High-Efficiency Pneumatic Water Separating Drain ValveA dual M16x1.5 drain valve for commercial vehicle air lines, helping discharge water and emulsified oil and reduce clogging-related moisture complaints.View Product →
Service tip: any drain valve that produces nothing at all during a full working day should be treated as blocked, not as "clean". A working drain produces a visible discharge of air and water at every cycle.
Problem 3: Oil Carryover From the Compressor
Oil in the air system is the single biggest hidden cause of premature air dryer failure, and it is almost always a compressor problem rather than a dryer problem. A compressor that passes oil is telling you its piston rings, cylinder bore or valve plate are worn, or that its cooling and lubrication balance is wrong.
Why Oil Destroys Drying Capacity
Desiccant works because water molecules stick to a vast internal surface area of microporous material. Oil does not just sit on the surface; it wicks into the pores and occupies the space the water would have used. A lightly oil-fouled bed can lose 20-30% of its effective capacity. A heavily fouled bed can lose more than half, and it becomes physically sticky, which increases pressure drop across the cartridge as well.
| Time in service | Clean cartridge, moderate duty | Oil-contaminated cartridge | Observable effect |
|---|---|---|---|
| 0-2 months | About 100% capacity | About 92% capacity | No visible difference |
| 3-6 months | About 90% capacity | About 70% capacity | First small traces of emulsion at the wet tank drain |
| 7-9 months | About 76% capacity | About 45% capacity | Compressor duty rises, build-up time lengthens |
| 10-12 months | About 60% capacity | About 25% capacity | Water reaches control valves; winter starting complaints |
| Beyond interval | Falls quickly, breakthrough likely | Effectively exhausted | Wet air, frozen orifices, sticky valves |
How to Confirm Oil Carryover
- Drain the wet tank into a clear container and let it stand. A dark film on the water surface, or a grey-brown sludge layer, confirms oil.
- Look at the compressor discharge line for signs of oil weeping at joints.
- Check the air filter and the compressor intake for restriction, which increases oil pull-over.
- Inspect the discharged cartridge. Uniform light grey or white means clean. Dark brown or sticky black means oil fouling.
The Practical Fix
Repair or replace the compressor first, clean the wet tank and lines, and only then fit a new cartridge. Coalescing cartridges, which combine a coalescing layer ahead of the desiccant bed, buy useful time in fleets where a compressor overhaul has to wait for the next scheduled workshop visit. They are a mitigation, not a substitute for fixing the source, but they do reduce the rate at which oil reaches the desiccant bed and prevent aerosol oil from travelling whole into the desiccant bed.
Problem 4: Freezing and Winter Blockage
Cold weather does not create new failure modes. It reveals existing ones, by freezing the water that should already have left the system. Three locations freeze first, and each produces a distinct symptom.
Where Ice Forms First
- The purge valve bore and exhaust port. Residual water in the exhaust path freezes and either locks the valve closed or cracks the seal area. Symptom: no purge, no pressure build-up until the vehicle warms up.
- The drain line or drain valve. Water in the drain path freezes solid and blocks it. Symptom: water accumulates in the wet section and eventually moves downstream.
- Control lines and small orifices. Ice in a 2-3 mm control line delays the purge signal or the unloader signal. Symptom: irregular governor behaviour and inconsistent cut-out pressure.
Heater and Thermostat Failures
Most heavy-duty air dryers for cold markets use a 24V heater element in the base or around the purge valve, usually combined with a thermostat or a positive temperature coefficient element. Failure modes are straightforward and testable:
- Open circuit element: no heating at all. Measurable with a multimeter; check against the OEM resistance value rather than a generic figure.
- Failed thermostat: the heater either never switches on or stays on until it burns out.
- Corroded connector: the most common cause of "the heater is new but still does not work". Look for green corrosion inside the plug.
- Wrong voltage: a 12V element on a 24V circuit fails quickly, and the reverse produces almost no heating.
Design Choices That Reduce Freezing Complaints
Dryers intended for cold climates benefit from a heated base, a purge valve whose sealing surface is away from standing water, and a mounting position that keeps the exhaust port clear of direct road spray and airflow. A heated assembly with an integrated supply port for the heater circuit, rated for the platform voltage and with a replaceable element, is far more serviceable than a base potted as one piece.
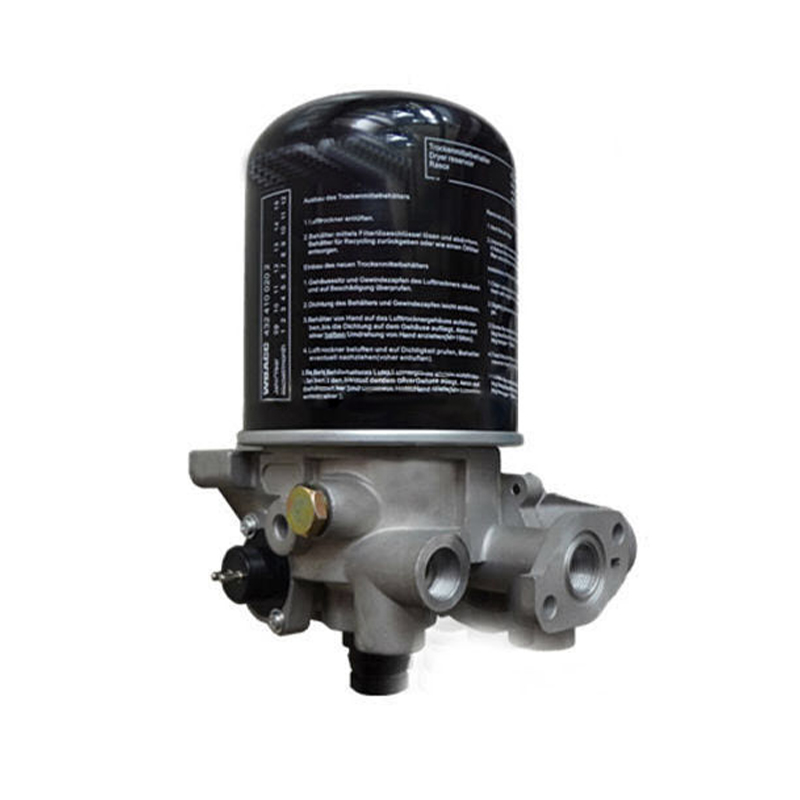 24V Heated Air Dryer Assembly for Heavy TrucksA 24V heated replacement for OEM 4324159040 with integrated silencer and M22x1.5 ports, helping keep exhaust ice-free in cold seasons.View Product →
Fleets operating in continental winters should also treat alcohol or anti-freeze additives with caution. Some additives attack seals and change the dew point behaviour of the bed. Mechanical moisture removal through a correct cartridge and a functioning heater is the more predictable route.
Problem 5: Wrong Sizing, Wrong Rating, Wrong Cartridge
Air dryers are rated at a specific flow, pressure and inlet temperature. A unit that is correct on paper at rated conditions becomes undersized in practice when the compressor is larger than the original specification, when the discharge temperature is high, or when ambient humidity is extreme.
Symptoms of an Undersized Dryer or Cartridge
- Pressure drop across the dryer above roughly 0.2 bar at working flow, rising as the cartridge loads with water.
- Wet air at the wet tank drain shortly after a fresh cartridge, with no oil present.
- Noticeably longer build-up time than an identical vehicle with a different specification.
- High purge frequency combined with wet results, meaning the bed is being cycled faster than it can dry.
Symptoms of an Oversized Dryer
An oversized dryer is less common but not harmless. It reduces pressure drop but increases internal volume and cost, and it may not reach the flow conditions needed to regenerate the bed effectively on vehicles with moderate air demand. In low-duty applications with frequent short trips, the compressor may unload too rarely for a large bed to purge fully.
Matching Cartridge to Assembly
The most common specification error in the aftermarket is fitting a cartridge by dimension rather than by duty rating. Two cartridges can share the same thread, the same outer diameter and the same height while differing substantially in desiccant mass, filter element quality and housing seal design. For fleets, the practical control is to record the assembly part number and the approved cartridge list per vehicle type, and to forbid cross-substitution between platforms unless engineering has confirmed the flow rating.
Problem 6: Installation and Mounting Mistakes
Installation errors produce failures that look internal but are entirely external, and they are the easiest category to eliminate permanently.
- Mounting angle. Most housings are designed for a near-vertical position so that condensate drains toward the purge valve. Tilt the unit beyond the manufacturer's allowance and water sits against the desiccant bed instead of the drain path.
- Exhaust port direction. If the exhaust points into airflow or toward the wheel spray zone, water and dirt are pushed back into the valve. Aim it downward and away from turbulent zones.
- Vibration. Over-tightened or missing bracket fasteners crack the mounting flange and loosen fittings. Bracket fatigue is a common cause of "the dryer is leaking" reports that have nothing to do with the internal seals.
- Torque on fittings and cartridges. Over-torquing distorts seals and deforms the seat. Under-torquing produces external leaks that mimic purge valve failure. Use the OEM torque figure, usually specified in the assembly documentation, and use a calibrated wrench.
- Contamination during installation. Debris entering an open port during a replacement will find its way to the purge seat within a few hundred kilometres.
When specifying a replacement assembly for a mixed fleet, the practical criteria are simple: correct platform ports, correct voltage for the heater circuit, correct flow rating for the compressor output, and a mounting interface that matches the original bracket without modification. A heavy-duty truck air dryer assembly that requires an adapter plate or a modified bracket is a permanent source of warranty argument and rework time in the workshop.
Problem 7: Electrical and Sensor Faults on Integrated Units
Integrated air processing units have absorbed functions that used to live in separate components: pressure regulation, multi-circuit protection, the governor function, and increasingly, pressure and temperature sensing. That integration improves packaging but adds electrical failure modes.
- Sensor supply faults. A 5V sensor on a 24V circuit, or a sensor wired to the wrong pin, produces implausible readings and fault codes that the diagnostic tool attributes to the air processing unit.
- Harness chafing. The dryer typically sits in a high-vibration area behind the cab or on the frame rail. Chafed insulation creates intermittent faults that appear and disappear with temperature.
- Water ingress. Connectors that are not sealed correctly corrode internally. The heater then fails, or the sensor signal drifts.
- Wrong part substitution. A unit with a different sensor characteristic can be mechanically identical but electrically incompatible, producing permanent fault codes.
The diagnostic discipline that saves the most money is to test the circuit before condemning the unit. Measure supply voltage at the connector under load, check sensor output against the published characteristic, and inspect the full harness run rather than only the plug. A significant share of returned electronic air processing units are electrically fault-free when bench tested.
Problem 8: Pressure Drop, Governor Interaction and Short Cycling
The dryer does not work alone. It sits between the compressor and the four-circuit protection valve, and its performance depends on the governor, the unloader and the leak rate of the whole vehicle.
Pressure Drop
A clean, correctly sized dryer should add only a small pressure loss at working flow, typically within the tolerance stated by the vehicle manufacturer and often quoted as no more than about 0.1-0.2 bar when new and dry. As the cartridge loads with moisture, pressure drop increases. Above roughly 0.3 bar, the driver notices slow build-up, and brake feel becomes less crisp. Above 0.5 bar, the system is behaving as if the compressor is undersized.
Governor and Unloader Interaction
The purge cycle is triggered by the unloader signal at cut-out. On European platforms this is commonly around 8.1 bar, with cut-in roughly 1 bar lower; North American platforms typically run higher, in the region of 120 psi cut-out. If the unloader valve leaks or the governor signal line is restricted, the purge signal becomes weak or irregular. The dryer then purges late, partially, or not at all, even though the valve itself is healthy.
Short Cycling and Leaks
This is the failure mode that most often gets blamed on the dryer without justification. A vehicle with a 15-20% leakage rate may keep the compressor loaded for 80-90% of its running time. Purge events fall sharply, the bed never fully regenerates, and moisture appears even with a correct cartridge and a correctly functioning valve. The sequence that fixes it is:
- Measure the leak rate at system pressure with the engine off and the system charged.
- Repair leaks before changing any dryer component.
- Verify that the compressor unloads and that a purge blast occurs at each unload.
- Only then assess the dryer itself.
Symptom-to-Cause Reference for the Workshop
The table below compresses the eight failure modes into a shop-floor decision aid. It assumes the vehicle is at working temperature and that the system has been charged and left to stabilise.
| Observed symptom | Most likely cause | Confirming test | Action |
|---|---|---|---|
| Hissing at the dryer with engine running | Purge valve seat not sealing | Soap test at the exhaust with the system charged and the compressor unloaded | Inspect seat and seal, replace valve or valve seat kit |
| No purge blast at cut-out | Blocked exhaust, stuck valve or lost control signal | Listen at cut-out; check control line for pressure | Clear exhaust path, test control line, free or replace valve |
| Water at wet tank drain | Saturated, oil-fouled or bypassed cartridge | Inspect discharged cartridge for oil and fines; check seal seating | Fix oil source, replace cartridge, clean downstream |
| Black or grey emulsion at drain | Oil carryover from the compressor | Standing test of drained fluid in a clear container | Repair or replace compressor, consider coalescing cartridge |
| Slow pressure build-up | Pressure drop across dryer, or system leak, or stuck purge valve | Compare wet tank pressure with compressor discharge; measure leak rate | Repair leaks first, then cartridge, then valve |
| Compressor never unloads | Continuous air loss, governor or unloader fault | Engine-off leak test and governor cut-out check | Repair leaks and unloader before touching the dryer |
| Cold-morning no-build, normal when warm | Ice in purge bore or drain path, heater failure | Measure heater resistance and supply voltage at the connector | Replace heater or harness, clear water path |
| Fault code for supply pressure sensor | Harness, connector or sensor fault | Live data comparison against a mechanical gauge | Repair circuit; replace unit only if electrically confirmed faulty |
Which Failure Mode Dominates in Real Service Data
The chart below shows a composite distribution of air dryer failure modes taken from the patterns we see in returned cores and from workshop feedback across European and North American platforms. The proportions vary by fleet, by climate and by maintenance discipline, but the ranking is remarkably stable: contamination and valve sealing problems dominate, and genuine structural failures of the housing are rare.
Relative frequency of air dryer failure modes (illustrative composite)
Saturated or oil-fouled cartridge
34%
Purge valve leak or no-open
22%
Drain and condenser blockage
15%
Freezing and heater failure
11%
Electrical and sensor faults
8%
Sizing and specification error
6%
Installation damage
4%
Rounded values. Use the ranking to prioritise inspection, not as a warranty classification.
The second chart shows why interval discipline matters more than brand selection. Effective drying capacity falls slowly for most of the service life and then drops sharply. The curve is not linear, which is exactly why a cartridge that "still looks fine" at eleven months can pass water at thirteen.
Effective drying capacity against months in service (clean cartridge, moderate duty)
0-2
3-4
5-6
7-8
9-10
11-12
13-15
16-18
19+
Horizontal axis shows months in service. Vertical column height represents relative drying capacity. An oil-contaminated bed follows a steeper curve and reaches the same low point in roughly half the time.
Specification and Tolerance Checklist
Most arguments about whether a dryer has failed come down to numbers that were never checked. The table below lists the parameters worth recording on a workshop job card. Confirm every figure against the vehicle manufacturer data for the specific platform before applying it.
| Parameter | Typical European platform | Typical North American platform | Notes |
|---|---|---|---|
| Governor cut-out pressure | Around 8.1 bar | Around 120-130 psi | Low cut-out reduces purge frequency and moisture removal |
| Cut-in pressure | Roughly 1 bar below cut-out | Roughly 20-30 psi below cut-out | A narrow band increases cycling and heat |
| Pressure drop across dryer at working flow | Typically within 0.1-0.2 bar when clean | Typically 2-3 psi when clean | Investigate above 0.3 bar or roughly 5 psi |
| Cartridge service interval | Often 12 months or 100,000 km | Often 12 months or 60,000 miles | Halve for severe duty, high humidity or heavy oil carryover |
| Heater circuit voltage | 24V typical | 12V or 24V depending on platform | Never substitute voltage; check resistance against OEM data |
| System leak rate | Platform-specific limit | Platform-specific limit | Excess leakage prevents purge and mimics dryer failure |
| Mounting angle | Within manufacturer allowance, near vertical | Within manufacturer allowance, near vertical | Angle errors trap water against the desiccant bed |
Repair or Replace: Practical Decision Rules
Fleets lose more money to repeat repairs than to parts. These decision rules are the ones that hold up in day-to-day operation.
| Condition found | Recommended action | Reason |
|---|---|---|
| Wet air, cartridge within interval, no oil | Inspect purge valve and drain path first | The bed is probably fine; water is not leaving the housing |
| Wet air with oil emulsion at drain | Repair compressor, clean system, replace cartridge | New cartridge alone will foul again within weeks |
| Purge valve leaking at the exhaust | Replace valve or seat kit; inspect for debris source | Leak keeps compressor loaded and stops effective purging |
| Purge valve bore corroded or scored | Replace the assembly or base | A new seal will not hold on a damaged bore |
| Heater open circuit, housing sound | Replace heater only | Cheaper and faster than a complete assembly |
| Housing cracked or threads damaged | Replace assembly | Structural damage cannot be sealed reliably |
| Repeated cartridge failure under 6 months | Audit the whole air system before fitting another cartridge | The cause is almost always external to the dryer |
Realistic Service Intervals by Duty Cycle
Published intervals assume average duty. Very few fleets operate at average duty. The table below is a practical starting point for adjusting intervals to the way the vehicle is actually used.
| Duty cycle | Cartridge interval | Drain and valve check | Notes |
|---|---|---|---|
| Long-haul, low humidity | 12 months or 100,000 km | Every service, purge test at 5,000 km | Standard interval generally works |
| Regional distribution, stop-start | 9-12 months | Monthly drain and purge verification | High cycling increases water load per kilometre |
| Construction, tipper, mixer | 6 months | Monthly, with oil check at every drain | Dust load and compressor heat accelerate fouling |
| Cold climate operation | 6-9 months | Heater test before each winter season | Freezing damage is usually a pre-existing water problem |
| High humidity, tropical operation | 6-9 months | Monthly drain check | Water load per cubic metre of air is far higher |
Frequently Asked Questions
Why is my air dryer purging water instead of just air?
Because the desiccant bed has reached breakthrough and is no longer holding moisture, or because condensate is collecting in the housing and being expelled on each cycle. Check the cartridge interval, the drain path and the presence of oil before replacing anything else.
How often should an air dryer cartridge be replaced?
Most commercial vehicle platforms specify around 12 months or 100,000 km, whichever comes first. Severe duty, heavy dust, high humidity and oil carryover justify halving that. Mileage alone is a poor guide on stop-start operations, where water load per kilometre is much higher.
Can a truck be driven with a failed air dryer?
The vehicle will often drive normally in warm weather, which is exactly why the problem escalates. Moisture reaches control valves, ABS or EBS modulators and brake chambers, and the first serious symptom tends to appear as a frozen or sticking valve in cold conditions. A dryer fault should be treated as a safety-relevant defect, not a comfort issue.
Why does my air dryer freeze in winter?
Water is already in the wrong place. Ice forms in the purge valve bore, the exhaust port or the drain line, and a failed heater or corroded connector removes the protection that would normally clear it. Fix the moisture source and verify the heater circuit before the season starts.
Why does the compressor keep running?
Almost always because air is leaving the system faster than it is being produced. A leaking purge valve, a leaking drain valve or general system leakage will keep the compressor loaded. Diagnose the leak first; treating it as a dryer internal fault wastes parts.
What causes oil to appear in the air dryer?
Worn compressor rings, a worn cylinder bore, a restricted intake or incorrect lubrication. Oil aerosol passes through the discharge line and coats the desiccant. The oil must be stopped at the compressor, otherwise the new cartridge will foul in the same way.
How do I know whether the problem is the cartridge or the purge valve?
Listen at cut-out. If there is a strong purge blast but the system stays wet, the cartridge or the drain path is the likely problem. If there is no blast, or a continuous hiss, the valve is the likely problem. Then confirm with a soap test at the exhaust and a drain sample from the wet tank.
Do I need a coalescing cartridge?
A coalescing design helps when the compressor passes aerosol oil, because it removes oil before it reaches the desiccant bed. It is a useful mitigation in fleets with older compressors, but it does not repair the compressor and does not extend the interval indefinitely.
What pressure drop across an air dryer is acceptable?
A clean, correctly sized unit typically adds only a small loss at working flow, commonly quoted as around 0.1-0.2 bar or 2-3 psi, and rising as the cartridge loads. Above roughly 0.3 bar, investigate the cartridge, the sizing and any downstream restriction.
Why did my new cartridge fail within three months?
Three causes cover most cases: oil contamination from the compressor, a purge valve that is not sealing or not opening, and a cartridge with insufficient desiccant mass for the duty. Check all three, and record the installation date so the pattern is visible.
What to Have Ready When You Order a Replacement
Order accuracy is where a large share of downtime is lost. These are the details that determine whether the part fits and performs on the first attempt.
Platform and Part Reference
Vehicle platform, model year range and the original assembly or cartridge reference. A photograph of the nameplate often resolves ambiguity faster than a description.
Port and Interface Details
Port thread type and size, inlet and outlet positions, and whether the mounting bracket is integrated or separate. Interface differences between European and North American platforms are the most common fitment error.
Voltage and Heater Circuit
12V or 24V, with or without a thermostat, and the connector type. A heated unit fitted to the wrong circuit either fails quickly or never clears ice.
Compressor Output and Duty
Compressor displacement and the typical duty cycle allow the flow rating to be verified. A dryer matched to an average duty vehicle will underperform on a heavy-haul tractor.
Cartridge Type and Interval Policy
Standard or coalescing cartridge, plus the interval your fleet actually follows. This determines the consumable list that goes with the assembly.
System Health Evidence
Drain sample appearance, leak rate measurement and pressure drop reading. These three items turn a part request into a correct diagnosis and prevent repeat failures.
Matching the dryer to the platform and to the way the vehicle works is the difference between a component that lasts its full interval and one that returns to the workshop twice a year. The parts themselves are straightforward. The system around them is where the problems live, and that is where the diagnosis should start.
Our Main Products
Copyright © Zhejiang Gongzheng Machinery Co., Ltd. All Rights Reserved.
