A brake chamber is a critical component in the air brake systems of heavy-duty vehicles such as trucks and buses. Its fundamental function is to convert the energy from compressed air into the mechanical force required to apply the brakes. When a driver presses the brake pedal, air pressure is directed into the brake chamber, pushing against a diaphragm that, in turn, moves a pushrod. This mechanical action is what ultimately activates the braking mechanism, bringing the vehicle to a stop.
Because the brake chamber is responsible for generating the force that stops a multi-ton vehicle, its proper function is non-negotiable for road safety. A bad brake chamber can lead to a range of dangerous issues, from reduced braking performance to complete brake failure. This guide will help you understand the symptoms of a faulty brake chamber, how to test for problems, and the steps involved in its replacement, ensuring your vehicle remains safe and reliable.
Understanding Brake Chambers
Components of a Brake Chamber
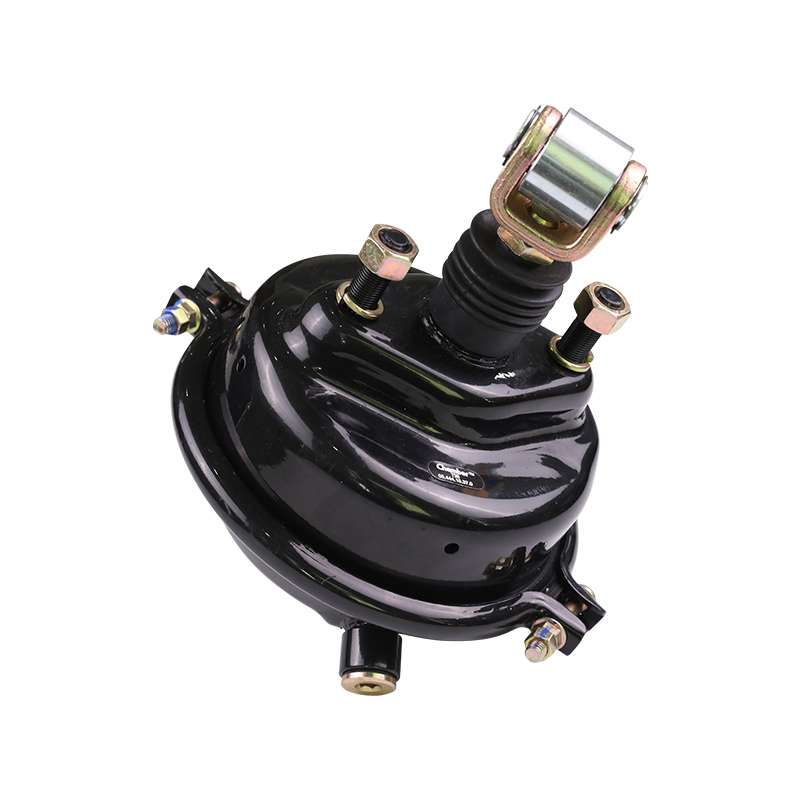
A typical air brake chamber is composed of several key parts working in unison:
- Housing: A sealed, circular metal casing that protects the internal components.
- Diaphragm: A flexible rubber disk inside the housing that separates the chamber into two compartments. This is the component that air pressure acts upon.
- Pushrod: A steel rod attached to the center of the diaphragm. When the diaphragm moves, the pushrod extends outward to transfer force to the slack adjuster.
- Return Spring: A strong coiled spring that pulls the diaphragm and pushrod back to their original position when air pressure is released.
- Non-Pressure Half: The front portion of the chamber housing where the pushrod exits.
- Pressure Half: The rear portion of the chamber housing where compressed air enters.
How a Brake Chamber Works
The process of converting air pressure into braking force is a simple yet powerful mechanical action:
- Air Entry: When the driver presses the brake pedal, compressed air from the vehicle's air tanks is routed through the brake lines and into the pressure half of the brake chamber.
- Diaphragm Movement: The incoming air pressure pushes against the diaphragm, causing it to flex and move forward.
- Force Transfer: The movement of the diaphragm, in turn, pushes the attached pushrod out of the chamber.
- Brake Application: The pushrod is connected to a slack adjuster, which rotates the S-camshaft. This rotation forces the brake shoes outward, pressing them against the brake drum and creating the friction needed to slow the vehicle.
- Return Action: When the driver releases the brake pedal, air pressure is released from the chamber. The strong return spring pulls the diaphragm and pushrod back to their resting position, releasing the brakes.
Different Types of Brake Chambers
While all brake chambers share the same basic principle, they are used for different braking functions. The two primary types are:
- Service Brake Chamber:
- Function: Used for regular, day-to-day braking.
- Description: This is a single-chamber unit that only performs the service braking function. It relies on compressed air to extend the pushrod and apply the brakes.
- Spring Brake Chamber (or Double Chamber):
- Function: Provides both service braking and emergency/parking braking.
- Description: This is a two-part unit, often called a "piggyback" chamber because the two sections are mounted together. It consists of a service brake chamber on the front and a powerful spring brake chamber on the rear.
Comparison of Brake Chamber Types
| Feature | Service Brake Chamber | Spring Brake Chamber |
|---|---|---|
| Function | Primary braking force for normal stops | Primary braking, plus parking and emergency braking |
| Components | Single chamber with a diaphragm and pushrod | Two chambers: a service side and a spring side |
| Operation | Uses air pressure to apply the brakes | Uses air pressure to release the spring brake, and air pressure to apply the service brake. Loss of air pressure in the spring side causes the brakes to be applied by spring force. |
| Safety Role | Provides standard braking | Acts as a failsafe; applies brakes automatically in case of air pressure loss or when parked |
Symptoms of a Bad Brake Chamber
Air Leaks
One of the most common and easily identifiable symptoms of a faulty brake chamber is an air leak. You may hear a distinct hissing sound coming from the area of the brake chamber, especially when the brakes are applied or released. A more serious leak will cause the vehicle's air pressure gauge to drop rapidly, often below the safe operating range, even when the engine is running and the air compressor is active. This indicates a loss of the air pressure needed to operate the braking system correctly.
Reduced Braking Performance
A failing brake chamber may not generate the full amount of force required to stop the vehicle efficiently. This can manifest as a feeling of "weak" or "spongy" brakes, requiring a longer stopping distance than usual. In some cases, a partial failure can lead to uneven braking, where one wheel or axle brakes less effectively than the others, compromising the vehicle's stability during a stop.
Visible Damage
Physical inspection can often reveal a problem with the brake chamber. Look for signs of external damage such as cracks, dents, or severe rust on the chamber housing. A bent or damaged pushrod is another clear indicator of an issue. Any visible compromise to the chamber's integrity can lead to internal damage, such as a torn diaphragm, and should be addressed immediately.
Brake Failure
The most severe symptom is a complete loss of braking power on one or more wheels. This happens when the brake chamber fails entirely, either due to a massive air leak or a complete mechanical breakdown of the internal components. In this scenario, the chamber is unable to apply any force, resulting in a brake that is completely unresponsive on the affected wheel.
Unusual Noises
During brake application, a faulty brake chamber may produce unusual sounds that are not part of normal operation. A popping sound could indicate a torn diaphragm snapping under pressure. Squealing or grinding noises may suggest a mechanical issue with the pushrod or its connection points, often due to improper alignment or internal wear.
Vehicle Pulling to One Side
If a brake chamber on one side of the vehicle is not functioning correctly, it will create an imbalance in braking force. When the brakes are applied, the wheel with the good brake chamber will apply more braking power than the wheel with the faulty one. This uneven braking causes the vehicle to pull or veer sharply to the side with the functioning brake, indicating a serious safety hazard.
Testing a Brake Chamber
Visual Inspection
Before any other tests are performed, a thorough visual inspection can identify many common issues. Carefully examine the entire brake chamber for signs of external damage. Look for cracks, dents, or significant rust on the housing. Check the mounting clamps and bolts to ensure they are secure and not corroded. The pushrod should be straight and free from damage. You can also spray a solution of soapy water on the chamber's seams and connections. If a leak is present, bubbles will form, indicating the exact location of the air escaping.
Air Pressure Test
This test verifies that the correct amount of compressed air is reaching the brake chamber. Using a specialized air pressure gauge, you can check the pressure at the brake chamber's inlet port. This reading should be consistent with the pressure indicated on the vehicle's dashboard gauge when the brakes are applied. If the pressure at the chamber is significantly lower, it may indicate a restriction in the air lines rather than a faulty brake chamber itself, but it’s an important diagnostic step.
Stroke Test
The stroke test measures the distance the brake chamber's pushrod travels when the brakes are applied. Excessive stroke indicates that the brakes are out of adjustment or that there is an internal issue with the chamber or brake components.
Pushrod Stroke Parameter Comparison:
| Condition | Pushrod Stroke Measurement |
|---|---|
| Normal | The pushrod stroke is within the manufacturer's specified limits (typically provided in the vehicle's service manual). This indicates proper brake adjustment and chamber function. |
| Excessive | The pushrod stroke exceeds the specified limits. This is a critical safety issue and may indicate a problem with the slack adjuster, brake shoes, brake drum, or an issue within the brake chamber itself. An excessively long stroke means less braking force is being applied. |
Leak-Down Test
A leak-down test is used to measure the rate at which air pressure is lost from the brake chamber. It is performed by pressurizing the air system and then monitoring the pressure drop over a specific period with the brakes held in the applied position.
Pressure Leak-Down Parameter Comparison:
| Condition | Pressure Drop Over Time |
|---|---|
| Normal | A minimal pressure drop over a specified time (e.g., less than 3 PSI per minute for a single vehicle). This indicates that the brake chamber and air lines are holding pressure effectively. |
| Excessive | A rapid or significant pressure drop over the same period. This indicates a major air leak, likely from a torn diaphragm, a damaged seal, or a faulty fitting on the brake chamber. |
Professional Inspection
While many of these tests can be performed by an experienced individual, it is always recommended to seek a professional inspection if you are uncomfortable with the procedures, do not have the proper tools, or if the tests reveal a serious problem. A qualified mechanic has the expertise to accurately diagnose complex air brake issues and perform any necessary repairs or replacements safely and correctly.
Brake Chamber Replacement
Tools and Materials Needed
To safely and successfully replace a brake chamber, you will need the following tools and materials:
- Replacement Brake Chamber: Ensure you have the correct type and size for your vehicle (e.g., a Type 30/30 double chamber).
- Wrench and Socket Set: A variety of sizes will be needed for the mounting bolts and air line fittings.
- Safety Glasses and Gloves: Essential personal protective equipment (PPE).
- Wheel Chocks: To prevent the vehicle from rolling.
- Jack and Jack Stands: For safely lifting and supporting the vehicle if needed.
- Aviation Snips or Bolt Cutters: If the clevis pin is secured with a cotter pin that needs to be replaced.
- Torque Wrench: To tighten mounting bolts to the manufacturer's specifications.
- Air Hose and Air Supply: To perform the final air tests.
Step-by-Step Guide
Follow these steps carefully to replace the brake chamber:
- Secure the Vehicle: Park the vehicle on a level surface and engage the parking brakes. Place wheel chocks on both the front and rear of the tires on the opposite axle to ensure the vehicle cannot move.
- Drain the Air System: Before beginning work, release all compressed air from the system by pumping the brake pedal until the air pressure gauges read zero. This is a critical safety step to prevent accidental brake application.
- Disconnect the Old Chamber:
- Using the appropriate wrench, carefully disconnect the air lines from the brake chamber.
- Disconnect the pushrod from the slack adjuster by removing the cotter pin and clevis pin.
- Unbolt the brake chamber from its mounting bracket. The number of bolts will vary by design.
- Install the New Chamber:
- Mount the new brake chamber onto the mounting bracket and hand-tighten the bolts.
- Reconnect the pushrod to the slack adjuster with the clevis pin and a new cotter pin.
- Re-connect the air lines to the new chamber, ensuring the fittings are secure.
- Finally, use a torque wrench to tighten the mounting bolts to the vehicle manufacturer's specified torque.
- Test the Brakes:
- Start the engine and allow the air pressure to build up to the normal operating range (typically 100-125 PSI).
- Perform a visual inspection and an air leak test on the new connections (using soapy water) to check for bubbles.
- Perform a functional test by applying the brakes to ensure proper operation. Visually confirm the pushrod extends and retracts correctly.
Safety Precautions
Working on an air brake system can be extremely dangerous if not done correctly. Always prioritize safety:
- Wear Safety Gear: Always wear safety glasses to protect your eyes from debris and gloves to protect your hands.
- Secure the Vehicle: Never work on the vehicle without properly chocking the wheels and ensuring the parking brake is engaged.
- Handle Spring Brakes with Extreme Caution: The spring inside a spring brake chamber is under immense pressure and can cause serious injury or death if released improperly. NEVER attempt to disassemble a spring brake chamber without a proper, dedicated spring brake cage tool and extensive training. If you are replacing a spring brake chamber, the replacement unit should come fully assembled and sealed.
- Release Air Pressure: Always confirm the vehicle's air system is fully drained before beginning work. This prevents the brakes from unexpectedly applying or releasing, which could cause a dangerous situation.
- When in Doubt, Consult a Professional: If you are not completely confident in your ability to perform this repair, it is safer to have a qualified mechanic perform the work.
Maintenance Tips
Regular Inspection of Brake Chambers
Consistent and proactive maintenance is the best way to prevent brake chamber failure. Incorporate a quick but thorough inspection of your brake chambers into your daily pre-trip or regular maintenance schedule. Visually check for any new cracks, dents, or signs of rust on the housing. Look for any loose mounting clamps or fittings, and listen for any hissing sounds that could indicate a minor air leak. Catching these issues early can prevent a small problem from escalating into a catastrophic brake failure.
Keeping the Air System Clean and Dry
The air brake system relies on a constant supply of clean, dry compressed air. Moisture and contaminants can corrode the internal components of a brake chamber, leading to rust, weakened seals, and diaphragm damage. Ensure your vehicle's air dryer is functioning correctly and its desiccant cartridge is replaced at recommended intervals. Additionally, regularly drain the air tanks of any accumulated moisture and oil by opening the drain valves. A clean and dry air supply is essential for the longevity of your brake chambers and the entire air system.
Replacing Worn or Damaged Components Promptly
Even small issues can compromise the integrity of the entire braking system. Do not delay in replacing any worn or damaged components you identify during an inspection. This includes things like frayed air lines, corroded fittings, or loose mounting hardware. A seemingly minor issue, like a worn cotter pin, can lead to a more serious failure, such as the pushrod detaching from the slack adjuster. Prompt replacement is a simple and effective maintenance practice that ensures the continued reliability and safety of your brake system.
Related Products
Brake Chambers
While the article focuses on the brake chamber itself, it's important to recognize that these components come in various types and sizes to fit different vehicle applications. The size is typically denoted by the chamber's type number (e.g., Type 30), which corresponds to the effective diaphragm area and determines the amount of force the chamber can produce.
Air Brake Hoses
These are the flexible lines that transport compressed air from the vehicle's air tanks to the brake chambers. They must be durable and resistant to high pressure, temperature, and environmental factors. A damaged or leaking air hose can prevent the brake chamber from receiving the necessary air pressure, leading to brake failure.
Brake Chamber Mounting Hardware
This includes the bolts, clamps, and brackets used to securely attach the brake chamber to the vehicle's axle or frame. Ensuring this hardware is in good condition is vital for the proper function and safety of the brake system, as loose or corroded mounts can lead to improper alignment or detachment.
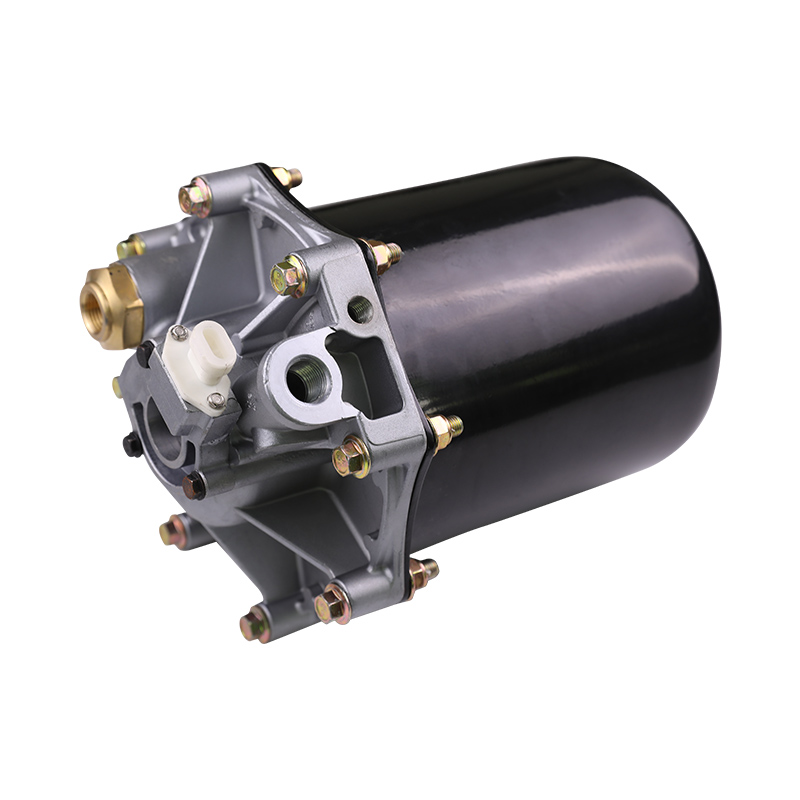
Air Compressors
The air compressor is the heart of the air brake system, responsible for generating and maintaining the supply of compressed air in the vehicle's air tanks. A malfunctioning compressor will not provide enough pressure for the brake chambers to operate, making it impossible to stop the vehicle.
Brake Calipers
While commonly found on disc brake systems, calipers are a related component on some heavy-duty vehicles that use air-over-hydraulic systems. They house the brake pads and press them against the rotor to create friction for braking. Their function is analogous to the brake shoes in a drum brake system.
Brake Pads
On disc brake systems, these are the friction materials that are pressed against the brake rotor to slow the vehicle. Their counterpart in a drum brake system is the brake shoe lining, which is applied by the brake chamber's force.
Brake Drums
The brake drum is a rotating, drum-shaped component attached to the wheel. When the brake shoes are forced against the inner surface of the drum, the resulting friction slows the wheel down. The brake chamber is the component that initiates this entire process.
Slack Adjusters
The slack adjuster is a mechanical lever that connects the brake chamber's pushrod to the S-camshaft. Its primary function is to maintain the correct clearance between the brake shoes and the brake drum, ensuring the brake chamber's pushrod stroke remains within safe limits for effective braking.
S-Camshafts
The S-camshaft is a rotating shaft with an "S"-shaped end. When the slack adjuster rotates the camshaft, the "S"-shaped end pushes the brake shoes apart and against the brake drum, applying the brakes. This component directly translates the brake chamber's linear motion into the rotational force needed for braking.
Wheel Seals
Wheel seals prevent grease from leaking out of the wheel hub and protect the bearings from moisture and dirt. While not directly part of the air brake system, a leaking wheel seal can contaminate the brake drum and brake shoe linings, reducing their friction and compromising braking performance.