


Gongzheng
Gongzheng
Gongzheng
Gongzheng
Gongzheng
Gongzheng
Gongzheng
Gongzheng
Gongzheng
Gongzheng
Gongzheng
Gongzheng
Gongzheng
Gongzheng
Gongzheng
Gongzheng


Content
- 1 What Is a Brake Chamber and How Does It Work?
- 2 What Is the Brake Chamber?
- 3 What Does 30 30 Brake Chamber Mean?
- 4 How Do You Know If a Brake Chamber Is Bad?
- 5 Can You Drive With a Broken Brake Chamber?
- 6 How to Cage a Brake Chamber Safely
- 7 Brake Chamber Repair: What Can Be Serviced?
- 8 How to Change a Brake Chamber
- 9 How to Replace a Brake Chamber Without Installation Errors
- 10 How to Select the Correct Air Brake Chamber
- 11 Brake Chamber Performance Characteristics
- 12 Brake Chamber Applications Across Commercial Vehicle Segments
- 13 Brake Chamber Maintenance and Inspection Schedule
- 14 Brake Chamber Frequently Asked Questions
- 15 Need a Brake Chamber Matched to Your Vehicle Application?
Commercial Vehicle Air Brake Guide
What Is a Brake Chamber and How Does It Work?
A brake chamber converts compressed air pressure into mechanical force that applies the brakes on trucks, trailers, buses, and other commercial vehicles. Correct chamber size, stroke, installation dimensions, and operating condition are essential for reliable braking performance.
Service Braking Converts compressed air pressure into pushrod movement during normal braking.
Parking Braking Uses stored spring force to hold the vehicle when parking air pressure is released.
Emergency Braking Applies spring braking force when system air pressure falls below a safe level.
01
Basic Construction
What Is the Brake Chamber?
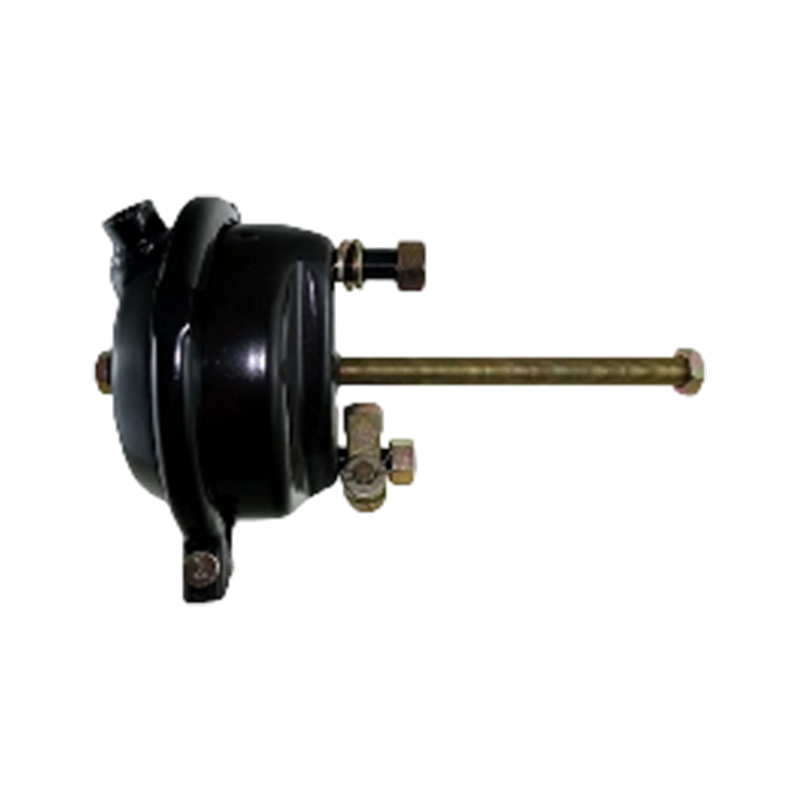
The question “What is the brake chamber?” refers to a key actuator in an air brake system. Compressed air enters the chamber and presses against a flexible diaphragm. The diaphragm moves a pressure plate and pushrod, transferring force to the slack adjuster, camshaft, brake shoes, or air disc brake mechanism.
A service brake chamber operates when the driver presses the brake pedal. A spring brake chamber combines a service section with a powerful mechanical spring section. This combined construction provides service braking, parking braking, and emergency braking functions.
The air brake chamber is normally mounted on an axle bracket or brake support structure. Pushrod alignment, chamber stroke, clevis position, mounting angle, and air port orientation directly affect braking efficiency and component life.
Main Brake Chamber Components
Pressure Housing
Contains air pressure and supports the diaphragm assembly.
Diaphragm
Converts compressed air pressure into linear movement.
Pushrod
Transfers chamber force to the foundation brake mechanism.
Return Spring
Returns the diaphragm after service air pressure is released.
Mounting Studs
Secure the air brake chamber to the axle mounting bracket.
Clevis Assembly
Connects the chamber pushrod to the slack adjuster.
02
Product Identification
What Does 30 30 Brake Chamber Mean?
A 30 30 brake chamber, also written as a 30/30 brake chamber, is a combined spring brake actuator. The first “30” identifies the nominal service chamber size, while the second “30” identifies the spring brake section size. This configuration is commonly installed on heavy truck drive axles and trailer axles.
30Service Chamber
Provides normal braking force when compressed air enters the service port.
/
30Spring Chamber
Provides parking or emergency braking through stored mechanical spring energy.
| Comparison Item | Type 30 Standard Stroke | Type 30 Long Stroke |
|---|---|---|
| Nominal diaphragm area | Approximately 30 square inches | Approximately 30 square inches |
| Typical rated stroke | Approximately 2.5 inches | Approximately 3 inches |
| Common identification | Standard housing and port markings | Long-stroke label, square port, or special marking |
| Typical application | Standard heavy-duty axle brake systems | Brake systems requiring additional available stroke |
| Replacement requirement | Replace with the same chamber size and stroke type | Do not replace with a standard-stroke chamber without verification |
Important Product Selection Point
Chamber size alone is not enough for replacement. A correct product match should also include stroke type, mounting stud spacing, pushrod length, clevis thread, air port position, chamber orientation, and vehicle application.
03
Fault Diagnosis
How Do You Know If a Brake Chamber Is Bad?
The answer to “How do you know if a brake chamber is bad” requires more than listening for an air leak. A professional inspection should evaluate air tightness, pushrod movement, brake release, chamber condition, mounting security, and side-to-side stroke consistency.
01
Continuous Air Leakage
A steady air leak during brake application may indicate a damaged service diaphragm, loose air fitting, cracked hose, worn seal, or distorted clamp connection.
02
Excessive Pushrod Stroke
Excessive pushrod travel can reduce available braking force. Possible causes include brake wear, incorrect adjustment, worn linkage, an incorrect chamber, or foundation brake damage.
03
Slow Brake Release
A pushrod that returns slowly may indicate internal corrosion, a distorted diaphragm, a bent pushrod, a damaged return spring, or a binding brake mechanism.
04
Uneven Braking
Different pushrod strokes on the same axle may cause vehicle pulling, unstable braking, uneven lining wear, and increased stopping distance.
05
Parking Brake Will Not Release
A spring brake that remains applied may be caused by insufficient air pressure, a damaged spring piston, blocked air passage, internal corrosion, or spring failure.
06
Housing or Bracket Damage
Cracks, heavy corrosion, loose mounting studs, damaged clamps, or a bent bracket require immediate inspection because they can change pushrod alignment.
Inspection Point
Normal Condition
Possible Fault
Air leakage
No continuous bubbling or audible air leak
Diaphragm, hose, fitting, seal, or housing damage
Pushrod movement
Smooth extension and complete return
Internal binding, corrosion, bent rod, or brake seizure
Chamber mounting
Secure, aligned, and free from cracks
Loose fasteners, damaged bracket, or incorrect installation
Stroke comparison
Similar movement on both sides of the axle
Adjustment, wear, linkage, or chamber specification issue
04
Driving Safety
Can You Drive With a Broken Brake Chamber?
No. A vehicle with a broken brake chamber should not continue normal road operation.
A damaged brake chamber can reduce braking force at one wheel, create uneven braking, cause continuous air loss, prevent the parking brake from releasing, or allow air system pressure to fall below a safe operating range.
Potential consequences include:
- Longer stopping distance under load
- Vehicle pulling during brake application
- Reduced parking brake holding force
- Air pressure warning activation
- Automatic spring brake application
- Brake overheating caused by drag
Mechanically caging a damaged spring brake only releases the spring section for controlled repair or vehicle recovery. It does not restore normal wheel-end braking performance.
05
Emergency Release Procedure
How to Cage a Brake Chamber Safely
The phrase “how to cage a brake chamber” describes the mechanical compression of the spring brake section with a release tool. Caging may be required when normal air pressure cannot release the parking brake or when the chamber must be removed under controlled workshop conditions.
1
Secure the Vehicle
Park on a stable surface, position the transmission controls correctly, and use suitable wheel chocks. Do not depend on the affected parking brake to hold the vehicle.
2
Inspect the Spring Housing
Check the housing, end cover, clamp area, mounting studs, and bracket. Stop the procedure if structural damage is visible.
3
Locate the Release Tool
Remove the release tool from its storage position on the chamber body and remove the access plug from the spring section.
4
Engage the Spring Piston
Insert the release tool into the access opening. Rotate it according to the chamber design until the cross pin engages the spring piston slot.
5
Install the Washer and Nut
Fit the washer and nut onto the release tool. Tighten by hand first to confirm correct thread engagement and tool alignment.
6
Compress the Power Spring
Use a hand wrench to tighten the release tool gradually. Do not use a high-speed impact wrench. Follow the specified caged dimension for the actual chamber model.
06
Repair Assessment
Brake Chamber Repair: What Can Be Serviced?
Components That May Be Serviceable
Serviceability depends on the chamber design and the approved repair procedure.
- Service diaphragm
- Service return spring
- Service-side clamp assembly
- Clevis and clevis pin
- Pushrod connection hardware
- External air fittings
Conditions Requiring Replacement
Brake chamber repair is not appropriate when structural safety is uncertain.
- Cracked or perforated housing
- Severe spring housing corrosion
- Broken power spring
- Deformed end cover
- Damaged spring locking mechanism
- Bent mounting studs or major impact damage
How to Repair Brake Chamber Problems Correctly
The search phrase “how to repair brake chamber” often leads to temporary fixes that should not be used on pressure-containing or spring-containing components. Welding, adhesive sealing, reshaping the housing, or installing an unapproved clamp can create a serious failure risk.
A repair decision should begin by identifying whether the fault is in the chamber, air hose, fitting, control valve, slack adjuster, clevis, brake cam, lining, drum, or mounting bracket. Replacing the chamber will not correct excessive stroke caused by worn foundation brake components.
07
Removal and Installation
How to Change a Brake Chamber
Before beginning a how to change a brake chamber procedure, record the original chamber specification and installation dimensions. A visually similar replacement may have a different stroke, port orientation, pushrod length, clevis configuration, or mounting pattern.
Chamber SizeType 20, Type 24, Type 30, 30/30, or another size
Stroke TypeStandard stroke or long stroke
Mounting PatternStud diameter and center distance
Pushrod DimensionsDiameter, thread, and usable length
Clevis PositionPin center and installed angle
Air Port OrientationService port and spring port location
Preparation
Secure the vehicle, release air pressure according to the service procedure, and cage an undamaged spring brake chamber when required.
Disconnection
Mark the service and spring air lines, remove the clevis pin, disconnect the hoses, and remove the mounting nuts.
Installation
Install the correct replacement, set the clevis position, connect the pushrod, and route the air lines without twisting or interference.
Testing
Uncage correctly, build air pressure, inspect for leaks, measure pushrod stroke, and test service and parking brake operation.
08
Replacement Procedure
How to Replace a Brake Chamber Without Installation Errors
Match the Original Stroke Type
A standard-stroke and long-stroke chamber may share the same nominal size but have different allowable travel. Never choose a replacement based only on the 30 30 brake chamber marking.
Set the Correct Pushrod Length
Cutting the pushrod too short may prevent connection. Leaving it too long may change slack adjuster geometry and reduce available chamber stroke.
Maintain Proper Pushrod Alignment
The pushrod should operate in line with the chamber and slack adjuster. Side loading can accelerate diaphragm, bushing, clevis, and bracket wear.
Connect the Correct Air Ports
The service line and spring brake line must not be reversed. Mark both hoses before removal and verify port identification during installation.
Check Surrounding Clearance
Confirm that the chamber does not contact the axle, suspension, tire, frame, hose, or nearby components throughout vehicle movement.
Verify Stroke After Installation
Measure applied pushrod stroke at the specified air pressure. Compare both sides of the axle and investigate any significant difference.
The phrases “how to replace a brake chamber,” “how to replace brake chamber,” and “how to change a brake chamber” describe a safety-critical repair. Installation should be performed by trained personnel using the applicable vehicle and actuator service data.
09
Product Selection
How to Select the Correct Air Brake Chamber
Correct air brake chamber selection helps maintain balanced braking force, predictable pushrod travel, reliable parking performance, and easier installation. Product identification should begin with the original chamber label and vehicle brake system data.
When the original label is missing or unreadable, measure the mounting pattern, pushrod, chamber diameter, installed length, clevis position, and air port orientation. Confirm whether the vehicle uses drum brakes or air disc brakes because actuator requirements may differ.
Application Truck, trailer, bus, drive axle, steer axle, or specialty vehicle
Actuator Type Service chamber, spring brake chamber, or disc brake actuator
Chamber Size Nominal diaphragm size required by the brake system
Stroke Specification Standard stroke or long-stroke configuration
Installation Dimensions Stud spacing, pushrod length, clevis, and port orientation
Environmental Protection Corrosion resistance, sealing quality, and drainage design
Manufacturing Focus
Brake Chamber Features That Support Reliable Operation
Controlled Diaphragm Movement
Consistent diaphragm geometry supports stable pushrod output during repeated brake applications.
Secure Housing Connection
Accurate forming and clamp assembly help maintain chamber sealing and structural alignment.
Corrosion-Resistant Surface
Protective surface treatment helps the housing withstand moisture, road salt, and operating contaminants.
Accurate Mounting Dimensions
Controlled stud spacing and pushrod geometry reduce installation problems and alignment errors.
Stable Spring Performance
Proper spring selection supports reliable parking force and repeatable release characteristics.
Application-Based Configuration
Different sizes, strokes, ports, pushrods, and mounting arrangements can suit varied vehicle systems.
10
Technical Data
Brake Chamber Performance Characteristics
The relationship between air pressure, chamber size, and pushrod force is fundamental to understanding brake system performance. The chart below illustrates the output force generated by different chamber sizes at varying air pressures.
Force (lb) 6000 5000 4000 3000 2000 1000 0
Chart shows approximate output force at specified air pressure for each chamber size. Actual values may vary based on diaphragm design and manufacturing tolerances.
11
Industry Applications
Brake Chamber Applications Across Commercial Vehicle Segments
Heavy-Duty Trucks
Class 8 tractors and straight trucks typically use Type 30 or Type 36 chambers on drive axles and Type 20 or Type 24 on steer axles. Spring brake chambers provide parking and emergency braking. Long-stroke versions are common on new equipment to accommodate extended lining life.
Trailers
Most trailers use spring brake chambers on all axles to provide parking brake function when disconnected. Type 30/30 chambers are the industry standard, though 24/24 and 20/20 configurations are also used. Corrosion-resistant coatings are essential for trailer applications due to exposure to road spray.
Buses & Motorcoaches
Buses use air brake chambers similar to trucks but with specific stroke and clearance requirements due to low-floor designs and independent front suspension. Type 20 and Type 24 chambers are common, with spring brake chambers used on rear axles for parking brake function.
Refuse & Vocational Vehicles
These vehicles operate in harsh environments with frequent stop-and-go duty cycles. Chambers must withstand high heat from repeated braking and exposure to corrosive materials. Heavy-duty coatings and high-temperature seals are often specified.
Air Disc Brake Systems
Air disc brakes use specialized actuators that combine the function of the brake chamber and slack adjuster into a single unit. These actuators require precise stroke control and are typically smaller in diameter than traditional chambers, making them suitable for limited-space applications.
Off-Highway & Specialty
Off-highway vehicles, such as construction equipment and mining trucks, use heavy-duty brake chambers designed for extreme conditions. These chambers feature enhanced sealing, impact-resistant housings, and corrosion protection for long-term reliability in abrasive environments.
12
Maintenance Program
Brake Chamber Maintenance and Inspection Schedule
A proactive maintenance program for brake chambers is essential for safe and reliable vehicle operation. Regular inspections help identify developing issues before they lead to failure, reducing downtime and repair costs.
Daily Pre-Trip Inspection
- Check for audible air leaks around the chamber and connections
- Listen for abnormal sounds during brake application and release
- Verify that the parking brake releases fully
- Inspect for visible damage, corrosion, or loose mounting
Monthly / 10,000 Mile Inspection
- Measure pushrod stroke at full brake application
- Compare stroke measurements between axles and sides
- Inspect air lines and fittings for cracks or chafing
- Check clevis pin for wear and secure retention
Annual / 100,000 Mile Inspection
- Perform thorough visual inspection of housing and mounting
- Check for corrosion pitting or structural damage
- Verify torque of mounting nuts and air line fittings
- Test air system for pressure drop and leak rate
Major Overhaul / 500,000 Mile
- Replace service diaphragms and return springs
- Inspect and replace clevis and pin as needed
- Check spring chamber for corrosion or damage
- Reassemble and test according to manufacturer specification
13
Technical Questions
Brake Chamber Frequently Asked Questions
What causes a brake chamber diaphragm to fail?
Common causes include age, heat, oil contamination, moisture, excessive stroke, incorrect assembly, internal corrosion, and repeated operation beyond the designed travel range.
Can a leaking air brake chamber be repaired?
Some service-side diaphragm assemblies may be repairable when the housing and approved components remain in good condition. A damaged spring section, heavily corroded housing, or deformed chamber should normally be replaced as a complete unit.
Can a 30 30 brake chamber replace another chamber size?
Not automatically. Chamber size determines output force and installation geometry. Replacement must match the brake system design, stroke type, mounting arrangement, pushrod dimensions, and axle application.
Why does a new brake chamber still have excessive stroke?
Excessive stroke may come from worn linings, an oversized drum, worn cam bushings, incorrect slack adjuster geometry, a loose clevis, an incorrect pushrod length, or improper brake adjustment.
Should both brake chambers on one axle be replaced together?
Replacement depends on component condition and maintenance policy. Both sides must use compatible chamber sizes and stroke specifications. Inspect the opposite chamber whenever one side has failed from corrosion, age, or excessive wear.
How often should brake chamber stroke be checked?
Stroke should be checked during routine brake inspections and whenever braking performance, adjustment, air leakage, lining wear, or wheel-end temperature appears abnormal.
What is the difference between standard and long-stroke chambers?
Long-stroke chambers have approximately 0.5 inches more rated travel than standard-stroke chambers of the same size. They provide additional stroke to accommodate worn brake linings and are typically identified with special markings or port configurations.
Can I convert a standard-stroke chamber to long-stroke?
No. The stroke type is determined by the internal design of the chamber. Converting a standard-stroke chamber to long-stroke would require replacing the entire unit with a correctly specified long-stroke chamber.
What is the typical service life of a brake chamber?
Service life varies widely depending on operating conditions, maintenance practices, and chamber quality. On-road vehicles typically achieve 300,000 to 500,000 miles of service before requiring diaphragm replacement, with some chambers lasting well over one million miles with proper maintenance.
How do I identify the correct replacement chamber when the label is missing?
Measure the mounting stud spacing, pushrod diameter and length, chamber diameter, and air port positions. Cross-reference these measurements with manufacturer specifications and consult the vehicle service manual for the original equipment part number.
Product Information
Need a Brake Chamber Matched to Your Vehicle Application?
Provide the chamber type, size, stroke, pushrod dimensions, mounting stud spacing, air port position, and vehicle application. Accurate specification details help identify a suitable service brake chamber or spring brake chamber configuration.
Our Main Products
Copyright © Zhejiang Gongzheng Machinery Co., Ltd. All Rights Reserved.
